Ideas for homeowners and renters
Make an energy saving plan your next step in saving money and energy in your home. Don’t make the same mistake as many homeowners, who rush into energy saving projects without the prep work.
So you’ve decided to cut your energy use. That’s a great idea, good for both your pocketbook and the planet. But where do you start? How do you make sure you’re saving as much as you can? How do you make sure the time and money you invest in improving your home or apartment’s energy efficiency, is time and money well spent?
You could just jump right in and look for a top ten energy saving hints, and try them one by one. There are certainly enough of them out there on the Web. (Oh, wait: my website’s already full of them! Check the navigation bars to the left!) Or look up my energy saving checklist and tackle some of the ideas in there, if you like the happy-go-lucky approach and aren’t too concerned about knowing exactly how well you’ve succeeded.
But if you’re organized (or aspire to be) and want to maximize your savings while keeping your costs down, an energy saving plan is the way to go. Don’t save haphazardly. Use an energy saving plan. Here in a nutshell is how you should build your own energy saving plan:
- Set your goals based on your objectives
- Measure consumption
- Identify opportunities
- Project your costs and savings
- Implement your energy saving actions
- Do follow-up measurements of both consumption and savings.
- Return to step 1 of your energy saving plan if you still haven’t met your goals!
- Do something different with the savings
Let’s imagine you own a typical house in the US Midwest and you are concerned about the amount of money you’re paying on natural gas and electricity. Or you’re concerned about the smog being produced by your electric utility, which burns mostly coal to generate your electricity. Or you’re concerned about the greenhouse gases being emitted by your electric utility or your own furnace or hot water heater. In any of these cases, what you really need to do is save energy. The money savings, the smog and greenhouse gas reductions, come from the energy savings. What do you do? Let’s look at each of the seven steps of an energy saving plan in more detail.
1. Set your energy saving plan goals based on your objectives
You need to set ambitious but realistic goals in your energy saving plan. For example, a 10% reduction in electricity or natural gas use is probably realistic for everyone (even for people like me who have already achieved that 10% reduction several times over). But maybe it’s not ambitious enough. That depends on the objective that is leading you to the goal.
Is your objective only to save money? Do you need exactly the 10% money savings you’d get if you cut energy use 10%? Or would more be better? Is it essential that you save more because you’re struggling to make ends meet?
Or is your objective to create a better world for the future? For your own kids, younger family members, perhaps even your own grandkids? If money is no object but you want to reduce your carbon footprint or the amount of smog produced by power companies on your behalf, shoot for an aggressive goal like 30-40%. It can be done, it just takes work, and probably some upgrades to your home or some new, more energy efficient appliances.
These objectives and goals should be reflected in your energy saving plan, and you should always keep them in mind, both as you build the remainder of your plan, and as you review your progress. If you don’t know what you’re trying to accomplish (your goals) or why (your objective), how will you know whether you’ve succeeded?
2. Measure consumption
Before you make any changes, measure consumption
Just about everyone skips this step, because they don’t use an energy saving plan. They just jump right in, and implement one idea after another without really knowing if or when they’ve met their energy saving goal.
Measurement is absolutely vital.
Not measuring your energy consumption, as an early part of your energy saving plan, before you start to cut your use, is like joining a dieting program without taking note of your starting weight. You might avoid the guilt or shame that comes from that initial measurement, but how will you know if you’ve succeeded in cutting use if you don’t understand your use to begin with?
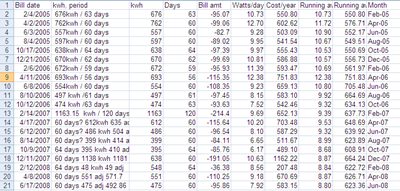
Measuring your consumption doesn’t just mean comparing the last utility bill from before you drafted your energy saving plan, with the first one afterwards. It means understanding seasonal and long-term use patterns and the use patterns for individual items in your home that use energy. It may even mean understanding the use patterns of each person in your home. Maybe there’s one person who’s responsible for most of the waste! (Who keeps putting the heat up to 75F and walking around the house in shorts and a t-shirt!?)
For example, even though my furnace and hot water heater aren’t on separate meters, I have a pretty good idea of what it costs per month to heat my hot water, because in June, July, and August my furnace is never on and I get utility bills every month. If one of those bills is based on an estimated meter reading, that throws things off because the utility company always overestimates my consumption when they don’t do an actual reading. (That’s one of the few downsides of being a true conserver: they make you pay for energy before you’ve used it!) When I do get an estimated reading in the summer, I try to read the meter right after I get the bill so I can adjust to the real reading. That way my notion of hot water heating costs remains realistic.
Or, in terms of electricity use, for your energy saving plan to succeed you should measure daily use for your entire house for at least a few weeks. You can either read the electrical meter directly, or if you have a ‘smart meter’ you might be able to read it through a website; ask your utility. Look for any fluctuations of more than 20% in use between consecutive days, and try to understand (or guess) what caused those fluctuations.You can go even further, and measure individual appliance/device use with a Kill-A-Watt meter or other electrical consumption meter.
This is what made the big difference for me. It turned out that about half the electricity I was wasting was from appliances or devices that I didn’t even know were using any energy!
In my initial energy saving plan, I decided as part of my measurement phase to measure individual item consumption (watts used, in most cases) for every electrical device in my home, and to estimate kilowatt hour consumption for each device by multiplying the wattage by the hours used per day and the days used per year for each device. This was a time consuming task, but surprisingly, my estimate of consumption (which I did before I checked my historical usage) turned out to be bang on the actual usage up to that point!
But then I’m a bit of a spreadsheet nut. You don’t need to be, you just need to be sure you understand where your energy is going. Is 30% of your electrical energy going to your fridge? Or are your kids leaving every light in the house on as they run through the rooms? Is your furnace churning away constantly, or is it your hot water heater that’s burning your natural gas budget? If you measure and understand your energy usage at a coarse level at least, you’re off to a good start. If you’ve nailed it to the ninth decimal place, well, you’ve gone too far!
3. Identify opportunities
If you have detailed measurements, or you included a home energy audit as part of your energy saving plan and you now have the audit report in front of you, your opportunities should be jumping out at you. If they aren’t, or if you weren’t able or willing to do detailed measurements, use my energy saving checklist to identify opportunities. The checklist will give you some feedback on how valuable an action is, because the checklist uses a points system to help you compare the relative merits of different opportunities. But the checklist is not a surefire way to save. I’ve assigned between 1 and 18 points for each energy saving action, based on what I think each action will save in a typical situation. But your situation is particular, and especially after you’ve started your energy saving plan, done your measurements, and/or had a home energy audit, you know your situation far better than I do. I’m not the one running about your home measuring stuff, you are! (And I’m not for hire either, unless you make a mean mincemeat tart!)
Your own measurements or your home energy audit will tell you whether your computer printer should be turned off except when you’re printing, or whether your windows need extra caulking. Your daily (or better yet, 3 or 4 times daily) electricity use patterns, combined with observations about what appliances or other electricity-drawing devices are being used when, will tell you whether there is some constant draw on your electricity meter or spikes during the day as appliances kick in.
The point is to use measurements and your own intelligence to figure out what needs to be done. Don’t worry, you really will discover the opportunities if you measure and you think a little!
4. Project your costs and savings
OK, so you’ve identified your opportunities. Do you jump right in and try the first energy saving action that will address an opportunity? Absolutely not!
First you need to project the cost and savings of each opportunity. You need to do this for two reasons:
- Knowing the cost and potential savings of each opportunity means you can prioritize your actions from lowest cost/highest opportunity (do those first) to higher cost/lower opportunity (do those later). It means you can avoid taking actions that will save you energy but that won’t save you money.
- Projecting the costs is part of the budgeting for your energy saving plan. If you haven’t projected the total costs or the costs of each action, you’re liable to spend a lot more on energy saving actions than you intended, and there go your savings!
Whether you create your own list of proposed actions or use my energy saving checklist, the cost and savings projections are fairly straightforward. For each item, estimate the cost of any new item (a more efficient light bulb or dishwasher, for instance) on the same row of your list or my checklist as the opportunity in question. Then estimate both current energy usage and the projected reduction. For instance, if you have discovered that your cable modem and wireless router, combined, use 33 watts of power continuously, but that you only use them two hours a day on average, attaching those devices to a power bar that you only turn on when the devices are needed could save you, in one year:
33 watts X (24 X 2) hours X 365 days / 1000 (watts per kilowatt) * $0.10 (per kilowatt hour) = $26.50
Now figure out what a power bar costs. If you look on eBay or use Google to find products for sale, you’ll get a good idea (but watch out that you aren’t pricing a high energy candy bar!). Suppose you can get a power bar from your local hardware store for $5.99, then it seems like this opportunity is worth pursuing.
You might also want to factor your own time into the cost side of the equation, perhaps by assigning yourself an hourly wage for this purpose, and including that in the cost. After all you only have so much time to put into executing your energy saving plan.
Once you have both the total savings per year and total cost identified, divide costs by savings to get your simple payback period. For the router/modem and power bar example, that could be:
$5.99 / $26.50 = 0.23 years or 2.7 months before this energy saving action will pay for itself!
In general, assuming several actions are in the same cost ballpark, you’ll want to tackle the fast-payback items before the slow-payback items. But don’t forget to tackle some of the really big opportunities early even if their payback period is long. If you wait years to implement them, the next occupant of your home may be the one getting the most benefit from the actions, instead of you!
5. Implement your energy saving actions

Fiberglass batt insulation
Once you’ve gone through the first four steps of an energy saving plan, step 5 is very straightforward. It can be a lot of work. After all, this is where you gut a bedroom and upgrade the insulation from 3.5 inches of 30-year-old, low-grade, matted down, blown in insulation, to 5.25 inches of Roxul. This is where you call every appliance store in the city looking for one that actually carries the ENERGY STAR rated dishwasher you’ve chosen to replace your avocado-colored antique. But you know what needs to be done, and in what order, based on the projected costs and savings of each action, and you do it!
6. Do follow-up measurements of both consumption and savings
You already know how to do the measurements. So do them again after you’ve implemented the bulk of your energy saving actions. If you had a home energy audit, and you’ve implemented some or all of the recommendations made by the audit, have a follow-up audit by the same company or auditor. (The follow-up audit is often included in the initial audit price, and if you’re eligible for a rebate from the government or a utility, the follow-up audit is usually required for the rebate.) For appliances and devices that you replaced with more energy-efficient ones, use that handy Kill-A-Watt meter to measure the new item’s consumption. And as before, check your daily electricity and gas usage for a few weeks as you’re implementing the actions and after you’re done, so you can see whether you’re meeting or exceeding the energy saving goals you set.
7. Return to step 1 if you still haven’t met your goals!
One of the great things about using an energy saving plan is that you can usually skip this step, because:
- You’ve set goals
- You’ve measured your consumption
- You’ve identified opportunities
- You’ve projected costs and savings
- You’ve implemented the best opportunities
- You’ve measured again to see how well you did.
If you do these six steps methodically, you will probably have met or exceeded your goals and won’t need to repeat the process!
But if you’re like me and you’re never satisfied even when you have met an energy saving goal, there’s always more room to save, after all, until you’re a net energy producer, you can still go back to step 1.
And if the energy saving actions you took didn’t get you the savings you projected, for example, you over-estimated savings or under-estimated costs, or if your savings were eaten up by increased energy costs, you may still be able to meet your goals (step 1) by repeating the process. But of course the law of diminishing returns applies each time you go through the process.
Incidentally, why would you go back to step 1 (setting goals) instead of skipping that and step 2 (measuring — which is the same as step 6) and going back to step 3?
Why revisit the goals? Because one possible reason we may have failed in our energy saving plan, could be that the goals were unrealistic.
Why redo the measurements? Because step 6 is about measuring what you measured before, to see if you met the opportunities you identified in step 3. Step 2 is about measuring things you haven’t measured yet, to identify new opportunities.
In any case, you will hopefully not have to repeat the whole process, because your energy saving plan will have practically guaranteed success. And that’s exactly why you may want to repeat the process!
8. Do something different with the savings
There is a paradox with energy savings, called the Jevons paradox, which states that any energy efficiency measure that increases the efficiency of an activity, simply results in the saved energy being consumed in some other way. For example, as part of your energy saving plan you might buy energy efficient LED house lights, which are far more efficient than incandescent lights, but now instead of turning them off when you leave the room, you leave them on all the time because they are so cheap.
You don’t want all the money and energy you save to be eaten up by the Jevons paradox. So do something different with the money you save. Make a commitment, as part of your energy saving plan, to spend at least part of your savings on more energy efficiency measures, on a night on the town (travel by bus or bicycle, of course), or a donation to a charity of your choice. If you are trying to save energy because you are having trouble making ends meet, then commit to use the savings to pay down debt. The key is not to feel complacent, once you’ve made your home more energy efficient, and start using up the energy you saved in some other way.
Sample energy saving plan for homes
Here’s a sample energy saving plan for a home in a cooler climate, to illustrate the 7-step energy saving plan process:
1 (a): Goal: Reduce heating costs by 20% and electrical costs by 30%.
1 (b): Objective: More money to pay off mortgage, and reduce our household’s energy use to less than the national average instead of more.
2: Measurement: Measure past heating and electrical costs by going back over past two years’ bills. Measure weekly heating costs and daily electrical costs by reading utility meters every morning at 7am. Measure key appliance efficiency with a Kill-A-Watt meter if one can be obtained from local library or purchased for under $30. Estimate typical yearly electrical usage for plug-in devices where wattage is known (for example, light bulb wattage or wattage indicated on a single-speed motor whose usage can be predicted).
3. Identify opportunities: Compare my appliance measurements and estimates to ENERGY STAR rated equivalents. Budget $300-1000 for upgrades to more efficient appliances if payback period is under 10 years. Use energy saving checklist results to find obvious and cheap ways to cut. Choose at least two actions that require me to be more disciplined or austere in my energy usage (e.g. always eat breakfast with the lights off).
4. Project my costs and savings: Use a computer spreadsheet or a table on graph paper to list the opportunities I’ve chosen to tackle, how much in kWh of electricity or CCF of natural gas I can save per day / month / year (use separate columns, fill in one only for each item), and total the kWh and CCF by day / month / year. Multiply as appropriate to compute a yearly energy savings. Multiply electricity and gas consumption projections by utility rates (including full cost such as delivery charge, transmission loss charge, service charges etc.). That gives my savings. Estimate the costs of any materials or services required to tackle each opportunity (e.g. buy CFL light bulbs or a programmable thermostat, pay for improved insulation to be installed in attic). That gives my costs. Divide costs by savings to figure out the payback period of each action. Remove opportunities from my list where the payback period is longer than the likely life of the upgrade (for example, a 25-year payback period on new windows, if my kids like to play baseball in the back yard), or is longer than 10 years.
5. Implement my energy saving actions: Tackle planned items in order of fastest payback (lowest ratio of (initial cost)/(annual savings). That is, take cheap actions that save a lot, before taking expensive actions that save a little. Hire a professional to do major renovation items. Hire a student to do simple repetitive tasks I’ve identified as required, such as caulking baseboards or windows, or tuck-pointing brickwork.
6. Do follow-up measurements of both consumption and savings: Continue measuring my consumption daily or weekly and noticing any improvements resulting from actions. Don’t take too many actions at once, so I can see what is helping and what isn’t. Plot last year’s consumption (in energy units, not dollars) on a graph in blue, and this year’s in red, to see how I’m doing on saving energy. Keep a ledger of this year’s costs including energy efficiency upgrades and utility bills, and compare to last year’s utility bills to see how I’m saving on money.
7. Return to step 1 if I still haven’t met my goals: I’m prepared to try all over again once if I haven’t met my goals of saving 20% on heating bills and 10% on electricity bills. If I didn’t meet my goals and I didn’t have a home energy audit done the first time, I’m committing myself to hiring a home energy auditor to do the audit the second run through. If I met my energy saving goals but utility costs shot up in the meantime, I’ll redo the whole process and potentially set more aggressive goals the second time through my energy saving plan.
8. Do something different with the savings: I don’t want to waste the savings realized in my energy saving plan by using the more energy efficient appliances I’ve bought more often. So to keep myself from falling into the Jevons paradox, I will roll half the money savings from my energy savings plan into energy efficiency upgrades, and I’ll donate the rest to a local conservation group. These conscious choices mean that every time I see a more energy efficient light left on, I can tell myself I need to save that energy to improve my energy efficient home, and to support a local conservation group, instead of telling myself I can afford that waste now.
It’s the methodology, stupid!
OK, I have a confession to make. I’m not as organized as this article might make you think. I didn’t go about making an energy saving plan before I began doing upgrades to my home. Like most people I tackled things as I learned about them. But eventually I did start incorporating more of the above planning steps into my home energy saving activities, and each time through, the benefits of planning have become more obvious to me.
I have another confession to make. I made up this whole methodology when I started to write this article. I’ve done each of the seven steps individually for different reasons and at different times, but I’ve never followed this seven-step process myself from end to end.
But looking back on what I’ve achieved in terms of savings, and what I’ve spent in terms of money and my own time, I wish I had used this methodology. I can see how much more I could already have saved, if I’d been clear on my goals from the outset, measured before the first light bulb got changed, made a careful list of possible actions, and projected what I’d dish out and what I’d save before the first cent was spent (other than the unavoidable, like buying my Kill-A-Watt meter). I would have implemented some energy saving actions I’ve so far avoided, and skipped some I really did, that haven’t paid off.
So take the advice of someone who has learned from his own mistakes: start building your energy saving plan right away!
Leave a Reply
Want to join the discussion?Feel free to contribute!